
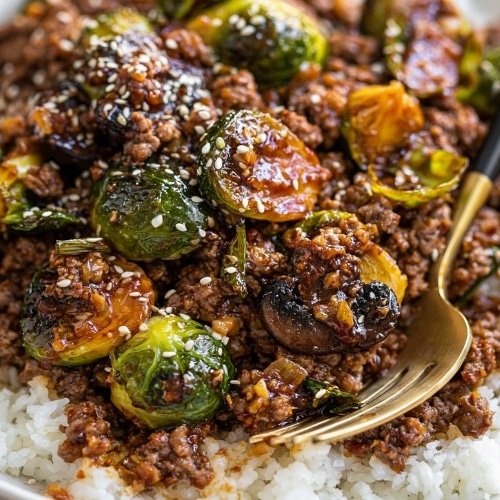
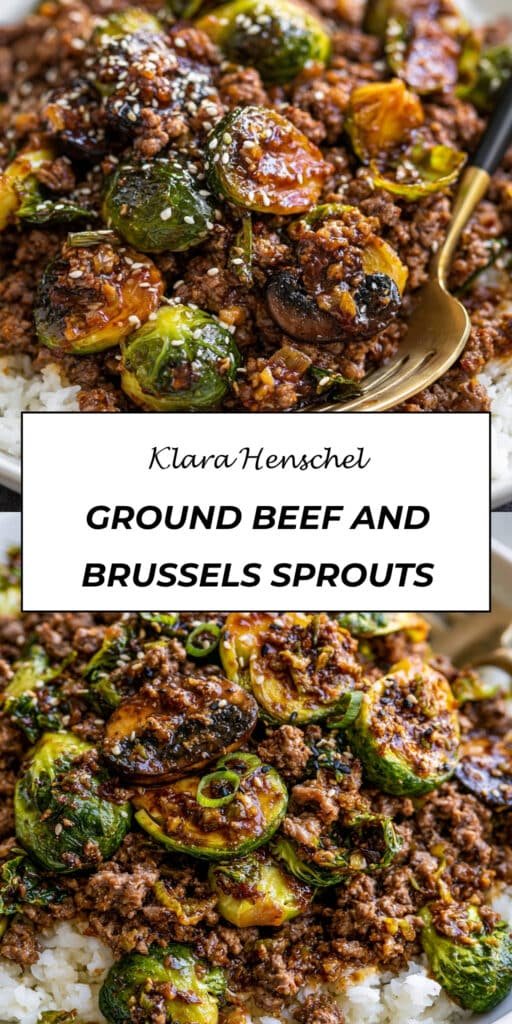
Looking for a quick, flavor-packed dinner that’s both satisfying and easy to make? This Ground Beef and Brussels Sprouts recipe combines lean ground beef, tender caramelized Brussels sprouts, and a sweet and spicy chili sauce for a delicious one-pan meal that’s ready in just 30 minutes. Every bite delivers the perfect balance of savory, sweet, tangy, and slightly spicy flavors.
Whether you’re searching for a simple weeknight dinner, an easy meal prep recipe, or a healthier alternative to takeout, this homemade Ground Beef and Brussels Sprouts is guaranteed to become a regular favorite. Serve it over rice, cauliflower rice, or noodles for a complete meal the whole family will enjoy.
Why You’ll Love This Recipe
- Ready in only 30 minutes.
- One-pan recipe with minimal cleanup.
- Sweet, savory, and slightly spicy flavors in every bite.
- High in protein and packed with nutritious vegetables.
- Perfect for meal prep and busy weeknights.
Ingredients
- Lean ground beef – Provides hearty, flavorful protein while keeping the meal satisfying.
- Garlic powder – Adds savory depth with minimal prep.
- Kosher salt – Enhances all of the flavors.
- Freshly ground black pepper – Brings gentle warmth and seasoning.
- Green onions – Add freshness and a mild onion flavor.
- Low-sodium soy sauce – Provides rich umami and balances the sweetness of the sauce.
- Sriracha (optional) – Adds a touch of heat for those who enjoy spicy dishes.
- Avocado oil – Ideal for sautéing thanks to its high smoke point.
- Shredded Brussels sprouts – Become tender and caramelized while adding fiber and nutrients.
- Sweet chili sauce – Creates the signature sweet and tangy glaze.
- Fresh lime juice – Brightens the dish and balances the rich flavors.
- Sesame seeds (optional) – Add a subtle crunch and beautiful finishing touch.
How to Make Ground Beef and Brussels Sprouts
Cook the Ground Beef
Heat a large skillet over medium heat.
Add the lean ground beef, breaking it into crumbles with a wooden spoon or meat chopper as it cooks.
Stir in the sliced green onions, garlic powder, soy sauce, sriracha (if using), salt, and black pepper.
Cook for about 7 to 8 minutes, or until the beef is fully browned and no longer pink.
Transfer the cooked beef to a plate and set aside.
Sauté the Brussels Sprouts
Add the avocado oil to the same skillet.
Stir in the shredded Brussels sprouts and season lightly with salt and pepper.
Cook for 6 to 8 minutes, stirring occasionally, until the sprouts become tender and develop lightly caramelized edges.
Combine Everything
Return the cooked ground beef to the skillet.
Pour in the sweet chili sauce and freshly squeezed lime juice.
Stir everything together until the beef and Brussels sprouts are evenly coated in the glossy sauce and heated through.
Garnish and Serve
Sprinkle with sesame seeds and additional sliced green onions if desired.
Serve immediately over your favorite grain or vegetable base.
Tips for Success
- Shredded Brussels sprouts cook much faster than halved sprouts.
- Don’t overcrowd the skillet so the Brussels sprouts caramelize instead of steam.
- Adjust the amount of sriracha to match your preferred spice level.
- Fresh lime juice adds brightness, so don’t skip it if possible.
- Taste the sauce before serving and adjust with additional soy sauce or lime juice if needed.
Equipment Needed
- Large skillet or sauté pan
- Wooden spoon or meat chopper
- Cutting board
- Sharp knife
- Measuring cups and spoons
Alternative: A cast-iron skillet works especially well for creating beautifully caramelized Brussels sprouts.
Recipe Variations
Low-Carb Version
Serve over cauliflower rice instead of traditional rice for a keto-friendly meal.
Ground Turkey Variation
Replace the ground beef with lean ground turkey or ground chicken for a lighter option.
Extra Veggie Stir-Fry
Add shredded carrots, bell peppers, snap peas, mushrooms, or broccoli for even more color and nutrition.
Asian-Inspired Version
Mix in fresh grated ginger, minced garlic, and a drizzle of toasted sesame oil for deeper Asian-inspired flavors.
Serving Suggestions
This Ground Beef and Brussels Sprouts pairs perfectly with:
- Steamed jasmine rice
- Brown rice
- Cauliflower rice
- Rice noodles
- Quinoa
- Garlic fried rice
- Roasted vegetables
- Asian cucumber salad
- Fresh lime wedges
- Chopped cilantro or green onions for garnish
It’s also excellent for meal prep since the flavors continue to develop after a day in the refrigerator.
Frequently Asked Questions
Can I make Ground Beef and Brussels Sprouts ahead of time?
Yes. This recipe stores beautifully and is perfect for meal prep lunches and quick dinners throughout the week.
How should I store leftovers?
Store leftovers in an airtight container in the refrigerator for up to 4 days.
Can I freeze it?
Absolutely. Freeze in individual freezer-safe containers for up to 3 months. Thaw overnight in the refrigerator before reheating.
Can I use frozen Brussels sprouts?
Yes. Thaw them first and shred or slice them before cooking. Fresh Brussels sprouts will caramelize slightly better, but frozen work well too.
Is this recipe spicy?
The spice level is very mild unless you add sriracha. You can easily adjust the heat by adding more or less according to your preference.
Can I substitute the sweet chili sauce?
Yes. You can use teriyaki sauce, hoisin sauce, Korean BBQ sauce, or make your own sweet chili sauce if preferred.
Final Thoughts
This Ground Beef and Brussels Sprouts recipe is proof that quick dinners don’t have to sacrifice flavor. Sweet chili sauce, savory ground beef, caramelized Brussels sprouts, and fresh lime create a delicious combination that’s both comforting and nutritious.
Whether you’re preparing a fast weeknight dinner, meal prepping for busy days, or simply looking for a new way to enjoy Brussels sprouts, this easy Ground Beef and Brussels Sprouts recipe is sure to become a staple in your kitchen. Give it a try, customize it with your favorite vegetables or toppings, and let us know how you made it your own—we’d love to hear about your delicious results!
Print
Ground Beef and Brussels Sprouts
- Total Time: 30 minutes
- Yield: 4 servings
- Diet: Gluten Free
Description
Sweet Chili Ground Beef and Brussels Sprouts is a quick and flavorful 30-minute skillet dinner made with lean ground beef, shredded Brussels sprouts, sweet chili sauce, soy sauce, and fresh lime juice. It’s the perfect balance of sweet, savory, and slightly spicy flavors for an easy weeknight meal.
Ingredients
- 1 pound lean ground beef
- 1/2 teaspoon garlic powder
- Kosher salt and freshly ground black pepper, to taste
- 1/3 cup thinly sliced green onions
- 2 tablespoons low-sodium soy sauce
- 1 teaspoon sriracha (optional)
- 1 tablespoon avocado oil
- 1 pound shredded Brussels sprouts
- 1/2 cup sweet chili sauce
- Juice of 1/2 lime
- Sesame seeds, for garnish (optional)
Instructions
- Add the ground beef to a large skillet and crumble it as it cooks over medium-high heat.
- Stir in the green onions, garlic powder, soy sauce, sriracha (if using), salt, and black pepper. Cook until the beef is browned and fully cooked.
- Transfer the cooked beef to a plate and set aside.
- Add the avocado oil to the same skillet, then add the shredded Brussels sprouts. Season with salt and pepper.
- Sauté the Brussels sprouts until tender and lightly caramelized, about 6-8 minutes.
- Return the cooked ground beef to the skillet.
- Add the sweet chili sauce and fresh lime juice. Stir until everything is evenly coated and heated through.
- Garnish with sesame seeds if desired and serve immediately over rice or your favorite grain.
Notes
- Add extra sriracha or red pepper flakes for more heat.
- Ground turkey or chicken can be substituted for the ground beef.
- Serve over white rice, brown rice, cauliflower rice, or noodles.
- Store leftovers in an airtight container in the refrigerator for up to 4 days.
- Prep Time: 10 minutes
- Cook Time: 20 minutes
- Category: Main Course
- Method: Stovetop
- Cuisine: Asian-Inspired