
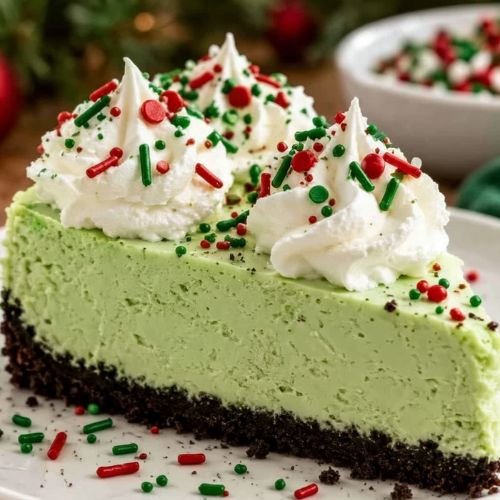
Bring a little Christmas mischief to your dessert table with this No-Bake Grinch Cheesecake! Inspired by the famous green holiday character, this festive dessert features a crunchy chocolate sandwich cookie crust topped with a fluffy, bright green vanilla cheesecake filling. Finish it with pretty whipped cream swirls and red and green sprinkles for a cheerful Christmas look.
The best part? There’s no oven involved. The filling comes together with cream cheese, powdered sugar, vanilla, and freshly whipped cream, creating a smooth, light texture that pairs perfectly with the rich chocolate crust.
Whether you’re planning a Christmas party, a family gathering, or simply want a fun holiday dessert, this Grinch Cheesecake is guaranteed to get attention. Just prepare it ahead, let it chill until firm, and decorate it right before serving.
Why You’ll Love This No-Bake Grinch Cheesecake
- No baking required: No need to turn on the oven. Simply prepare the crust, mix the filling, and refrigerate.
- A fun Christmas appearance: The bright green filling, whipped cream, and colorful sprinkles make this cheesecake perfect for the holiday season.
- Creamy and fluffy texture: Whipped cream gives the cheesecake filling a light, silky consistency.
- Rich chocolate cookie crust: The chocolate sandwich cookies create a delicious contrast to the sweet vanilla filling.
- Easy to prepare ahead: The cheesecake needs several hours to chill, making it a convenient dessert for busy holiday schedules.
- Perfect for sharing: One cheesecake makes 12 slices, ideal for Christmas parties and family celebrations.
Ingredients You’ll Need
Chocolate Cookie Crust
- 300 g chocolate sandwich cookies: These form the crunchy chocolate base. Crush the cookies finely for a crust that holds together well.
- 80 g unsalted butter, melted: Binds the cookie crumbs and gives the crust its rich flavor.
Green Cheesecake Filling
- 450 g full-fat cream cheese, softened: The foundation of the cheesecake filling. Use block-style cream cheese for a smooth and stable result.
- 120 g powdered sugar: Sweetens the filling and blends easily with the cream cheese.
- 1 teaspoon vanilla extract: Adds a warm vanilla flavor that complements the chocolate crust.
- Green gel food coloring: Creates the signature bright Grinch-green color without adding extra liquid.
- 360 ml heavy cream, cold: Whipped to stiff peaks and folded into the filling for a light, fluffy texture.
Decorations
- Whipped cream: Used to pipe decorative swirls around the edge of the cheesecake.
- Red and green sprinkles: Add a festive finishing touch and bring the Christmas colors together.
Equipment Needed
- 9-inch (23 cm) pie dish or springform pan: Holds the cookie crust and cheesecake filling.
- Food processor or freezer bag and rolling pin: For crushing the chocolate sandwich cookies.
- Large mixing bowl: For preparing the cream cheese filling.
- Electric hand mixer or stand mixer: Makes it easier to beat the cream cheese until smooth.
- Chilled mixing bowl: Helps heavy cream whip properly.
- Whisk or electric mixer: For whipping the heavy cream to stiff peaks.
- Rubber spatula: Useful for gently folding the whipped cream into the filling.
- Piping bag and decorating tip: For adding whipped cream around the cheesecake.
- Measuring cups and spoons: For accurate ingredient measurements.
How to Make No-Bake Grinch Cheesecake
Step 1: Prepare the Chocolate Cookie Crust
Place the chocolate sandwich cookies in a food processor and pulse until they become fine crumbs. If you don’t have a food processor, put the cookies in a sealed freezer bag and crush them with a rolling pin.
Transfer the crumbs to a bowl and add the melted butter. Mix until all the crumbs are evenly coated and the mixture resembles wet sand.
Press the mixture firmly into the bottom and up the sides of a 9-inch pie dish or springform pan. Use the back of a spoon or a flat-bottomed glass to create an even crust.
Place the crust in the refrigerator for 30 minutes to firm up while you prepare the filling.
Step 2: Beat the Cream Cheese
Place the softened cream cheese in a large mixing bowl.
Using an electric mixer, beat for approximately 2 minutes until the cream cheese is smooth, creamy, and fluffy. Scrape down the sides of the bowl as needed to remove any lumps.
Starting with properly softened cream cheese makes this step much easier.
Step 3: Add the Sugar, Vanilla, and Green Coloring
Add the powdered sugar and vanilla extract to the cream cheese.
Beat until the mixture is smooth and fully combined.
Add green gel food coloring a little at a time, mixing after each addition until you reach a bright Grinch-green shade. Remember that gel coloring is concentrated, so you usually won’t need much.
Step 4: Whip the Heavy Cream
Pour the cold heavy cream into a separate chilled mixing bowl.
Using a clean whisk attachment or mixer, whip the cream until stiff peaks form. When you lift the beaters, the peaks should hold their shape rather than falling back into the bowl.
Keep the whipped cream cold until you’re ready to fold it into the cheesecake mixture.
Step 5: Combine the Cheesecake Filling
Add half of the whipped cream to the green cream cheese mixture.
Gently fold it in with a rubber spatula, using slow movements to keep the mixture light and airy. Add the remaining whipped cream and continue folding until everything is evenly combined.
Avoid stirring too vigorously, as this can deflate the whipped cream and make the filling less fluffy.
Step 6: Fill the Crust
Remove the chilled chocolate cookie crust from the refrigerator.
Spoon the green cheesecake filling into the crust, spreading it evenly from the center toward the edges.
Smooth the top with a spatula so the cheesecake has a neat, even surface.
Step 7: Chill Until Firm
Cover the cheesecake carefully and refrigerate for at least 6 hours, or preferably overnight.
The chilling time allows the filling to firm up and makes it easier to cut clean slices. Don’t rush this step, especially if you’re preparing the cheesecake for a party.
Step 8: Decorate the Cheesecake
Once the cheesecake is completely chilled and firm, prepare the whipped cream for decorating.
Transfer the whipped cream to a piping bag fitted with your favorite decorating tip. Pipe small dollops or swirls around the edge of the cheesecake.
Finish with red and green Christmas sprinkles. Add them just before serving for the freshest appearance.
Step 9: Slice and Serve
Use a sharp knife dipped in warm water and wiped dry to cut the cheesecake into slices.
Wipe the knife clean between cuts for neat edges and beautiful layers.
Serve the cheesecake chilled and enjoy the combination of chocolate cookie crust and fluffy green vanilla filling!
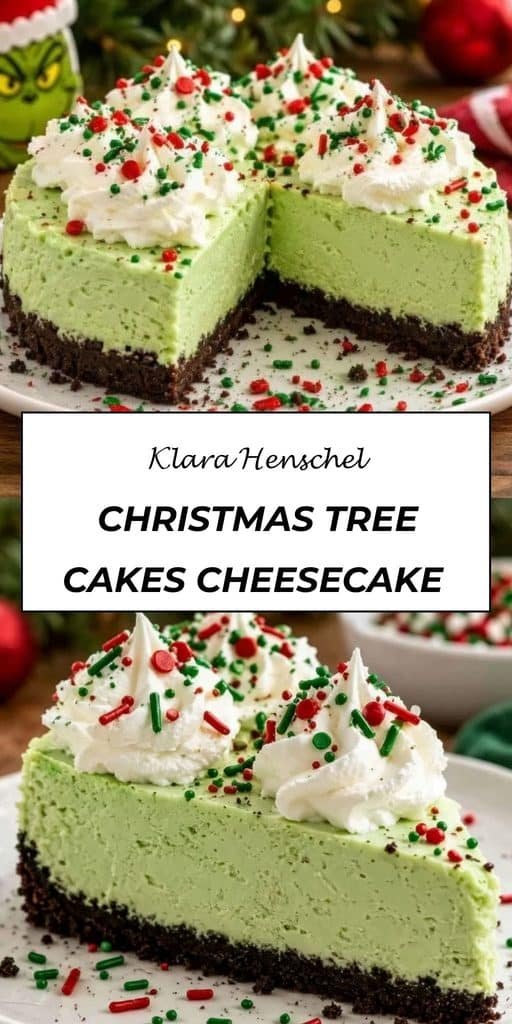
Tips for the Best No-Bake Grinch Cheesecake
- Use full-fat block cream cheese: This gives the filling the structure it needs to hold its shape. Avoid spreadable cream cheese from a tub.
- Soften the cream cheese properly: Room-temperature cream cheese blends more easily and helps prevent lumps.
- Choose gel food coloring: Gel coloring creates a vibrant green without adding extra moisture to the filling.
- Add coloring gradually: Start with a small amount and increase until you reach your preferred shade of green.
- Keep the heavy cream cold: Cold cream whips more easily and holds its shape better.
- Whip to stiff peaks: This is important because the whipped cream helps give the cheesecake its light texture and structure.
- Fold gently: Use a spatula rather than beating the whipped cream into the cream cheese mixture. Gentle folding helps keep the filling airy.
- Chill long enough: Refrigerate for at least 6 hours, preferably overnight, so the cheesecake has enough time to set.
- Decorate just before serving: Add the whipped cream and sprinkles close to serving time for the prettiest presentation.
Recipe Variations
1. Make a Mint Grinch Cheesecake
If you enjoy the combination of mint and chocolate, add ½ teaspoon of peppermint extract to the cream cheese mixture along with the vanilla. The peppermint gives the cheesecake a refreshing holiday flavor that works beautifully with the chocolate cookie crust.
2. Use a Graham Cracker Crust
For a lighter-flavored base, replace the chocolate sandwich cookies with graham cracker crumbs. Combine them with melted butter and press into the pan as directed. The result is a sweeter, more traditional cheesecake-style crust.
3. Add a White Chocolate Layer
Melt some white chocolate and allow it to cool slightly before gently incorporating it into the cream cheese mixture. This adds extra sweetness and a lovely white chocolate flavor. Make sure the chocolate isn’t hot when you add it.
4. Make Individual Grinch Cheesecake Cups
Instead of preparing one large cheesecake, divide the cookie crust among small dessert cups or glasses. Add the green filling, smooth the tops, and refrigerate until set. Finish each cup with whipped cream and sprinkles for easy individual servings.
5. Add a Chocolate Drizzle
For an extra chocolatey finish, drizzle melted chocolate or chocolate sauce over the whipped cream decorations. The dark chocolate creates a beautiful contrast against the bright green filling.
Serving Suggestions
This No-Bake Grinch Cheesecake is best served cold, making it a refreshing addition to a holiday dessert table. Its bright color makes it especially fun for Christmas celebrations, and the chocolate crust gives it enough richness to satisfy any chocolate lover.
Here are a few ways to serve it:
- With hot chocolate: A warm mug of hot chocolate makes a cozy holiday pairing.
- Alongside Christmas cookies: Serve with gingerbread cookies, sugar cookies, or chocolate crinkle cookies.
- With fresh strawberries: Their fruity flavor adds a fresh contrast to the creamy cheesecake.
- As part of a festive dessert table: Pair it with Christmas brownies, peppermint treats, and holiday cupcakes.
- With coffee: A cup of coffee balances the sweetness and makes this cheesecake a lovely after-dinner dessert.
Frequently Asked Questions
Can I make No-Bake Grinch Cheesecake the day before?
Absolutely! This cheesecake is ideal for preparing ahead. Make it the day before your gathering and refrigerate overnight. You can add the whipped cream decorations and sprinkles shortly before serving.
How do I get a bright Grinch-green color?
Use green gel food coloring rather than liquid coloring. Add a little at a time until the filling reaches the shade you like. Gel coloring is more concentrated, so it won’t thin the cheesecake mixture.
Why isn’t my no-bake cheesecake setting?
The most common reasons are cream that wasn’t whipped to stiff peaks, cream cheese that wasn’t full-fat, or insufficient chilling time. Make sure the heavy cream holds its shape and refrigerate the cheesecake for at least 6 hours, preferably overnight.
Can I use store-bought whipped topping instead of heavy cream?
The recipe uses heavy cream whipped to stiff peaks because it helps create the filling’s fluffy texture and structure. A prepared whipped topping may work as a substitute, but the consistency and final texture can be different.
How should I store leftover Grinch Cheesecake?
Cover the cheesecake or transfer individual slices to an airtight container. Store in the refrigerator for up to 4 days. Keep it chilled until ready to serve.
Can I freeze No-Bake Grinch Cheesecake?
Yes. Wrap the cheesecake tightly or place individual slices in a freezer-safe container and freeze for up to 1 month. Thaw in the refrigerator before serving. For the best presentation, add fresh whipped cream and sprinkles after thawing.
Final Thoughts
This No-Bake Grinch Cheesecake is a fun and delicious way to add a little Christmas spirit to your holiday celebrations. With its crunchy chocolate cookie crust, fluffy green vanilla filling, and festive whipped cream decorations, it’s a dessert that looks impressive without requiring complicated baking techniques.
Prepare it the night before, let the refrigerator do the hard work, and decorate it when you’re ready to serve. Whether you’re making it for a Christmas party, a family dinner, or a festive movie night, this cheerful cheesecake is sure to bring smiles to the table.
Give it a try, and don’t forget the red and green sprinkles. After all, even the Grinch deserves a little dessert!
Print
No-Bake Grinch Cheesecake
- Total Time: 6 hours 55 minutes
- Yield: 12 slices
- Diet: Vegetarian
Description
Fun, festive, and irresistibly creamy, this No-Bake Grinch Cheesecake features a buttery chocolate cookie crust filled with fluffy, bright green vanilla cheesecake filling. Decorated with whipped cream and red and green sprinkles, this easy Christmas dessert is perfect for holiday parties, family gatherings, and festive celebrations. No oven required!
Ingredients
- For the Chocolate Cookie Crust:
- 300 g chocolate sandwich cookies
- 80 g unsalted butter, melted
- For the Green Cheesecake Filling:
- 450 g full-fat cream cheese, softened
- 120 g powdered sugar
- 1 teaspoon vanilla extract
- Green gel food coloring, as needed
- 360 ml heavy cream, cold
- For Decorating:
- Whipped cream, for piping
- Red and green sprinkles, as needed
Instructions
- Prepare the chocolate cookie crust: Crush the chocolate sandwich cookies into fine crumbs. Mix with the melted butter until evenly combined. Press the mixture firmly into the bottom and sides of a 9-inch (23 cm) pie dish or springform pan. Refrigerate for 30 minutes.
- Beat the cream cheese: Place the softened cream cheese in a large mixing bowl. Beat for about 2 minutes until smooth and fluffy.
- Add sugar, vanilla, and color: Add the powdered sugar and vanilla extract. Beat until smooth and creamy. Gradually add green gel food coloring until the filling reaches a bright Grinch-green shade.
- Whip the heavy cream: Pour the cold heavy cream into a separate chilled bowl. Whip until stiff peaks form.
- Combine the cheesecake filling: Gently fold the whipped cream into the green cream cheese mixture in two additions. Continue folding until evenly combined and fluffy.
- Fill the crust: Spoon the green cheesecake filling into the chilled chocolate cookie crust. Spread evenly and smooth the top with a spatula.
- Chill the cheesecake: Cover and refrigerate for at least 6 hours or overnight, until the cheesecake is firm enough to slice.
- Decorate the cheesecake: Pipe whipped cream dollops around the edge of the chilled cheesecake. Sprinkle with red and green Christmas sprinkles just before serving.
- Slice and serve: Slice the cheesecake using a warm, clean knife. Wipe the knife between cuts for neat slices. Serve chilled and enjoy!
Notes
- Use softened, full-fat block cream cheese for a smooth and stable filling.
- Gel food coloring gives the brightest green color without thinning the cheesecake mixture.
- Fold the whipped cream gently to keep the filling light and fluffy.
- For the best texture and clean slices, chill the cheesecake overnight.
- Refrigerate leftovers in an airtight container for up to 4 days.
- The cheesecake can be frozen for up to 1 month. Thaw in the refrigerator before serving.
- Prep Time: 25 minutes
- Cook Time: 0 minutes
- Category: Dessert, Christmas Desserts, No-Bake Cheesecakes
- Method: No-Bake, Chilling
- Cuisine: American